🧨 one time passwords
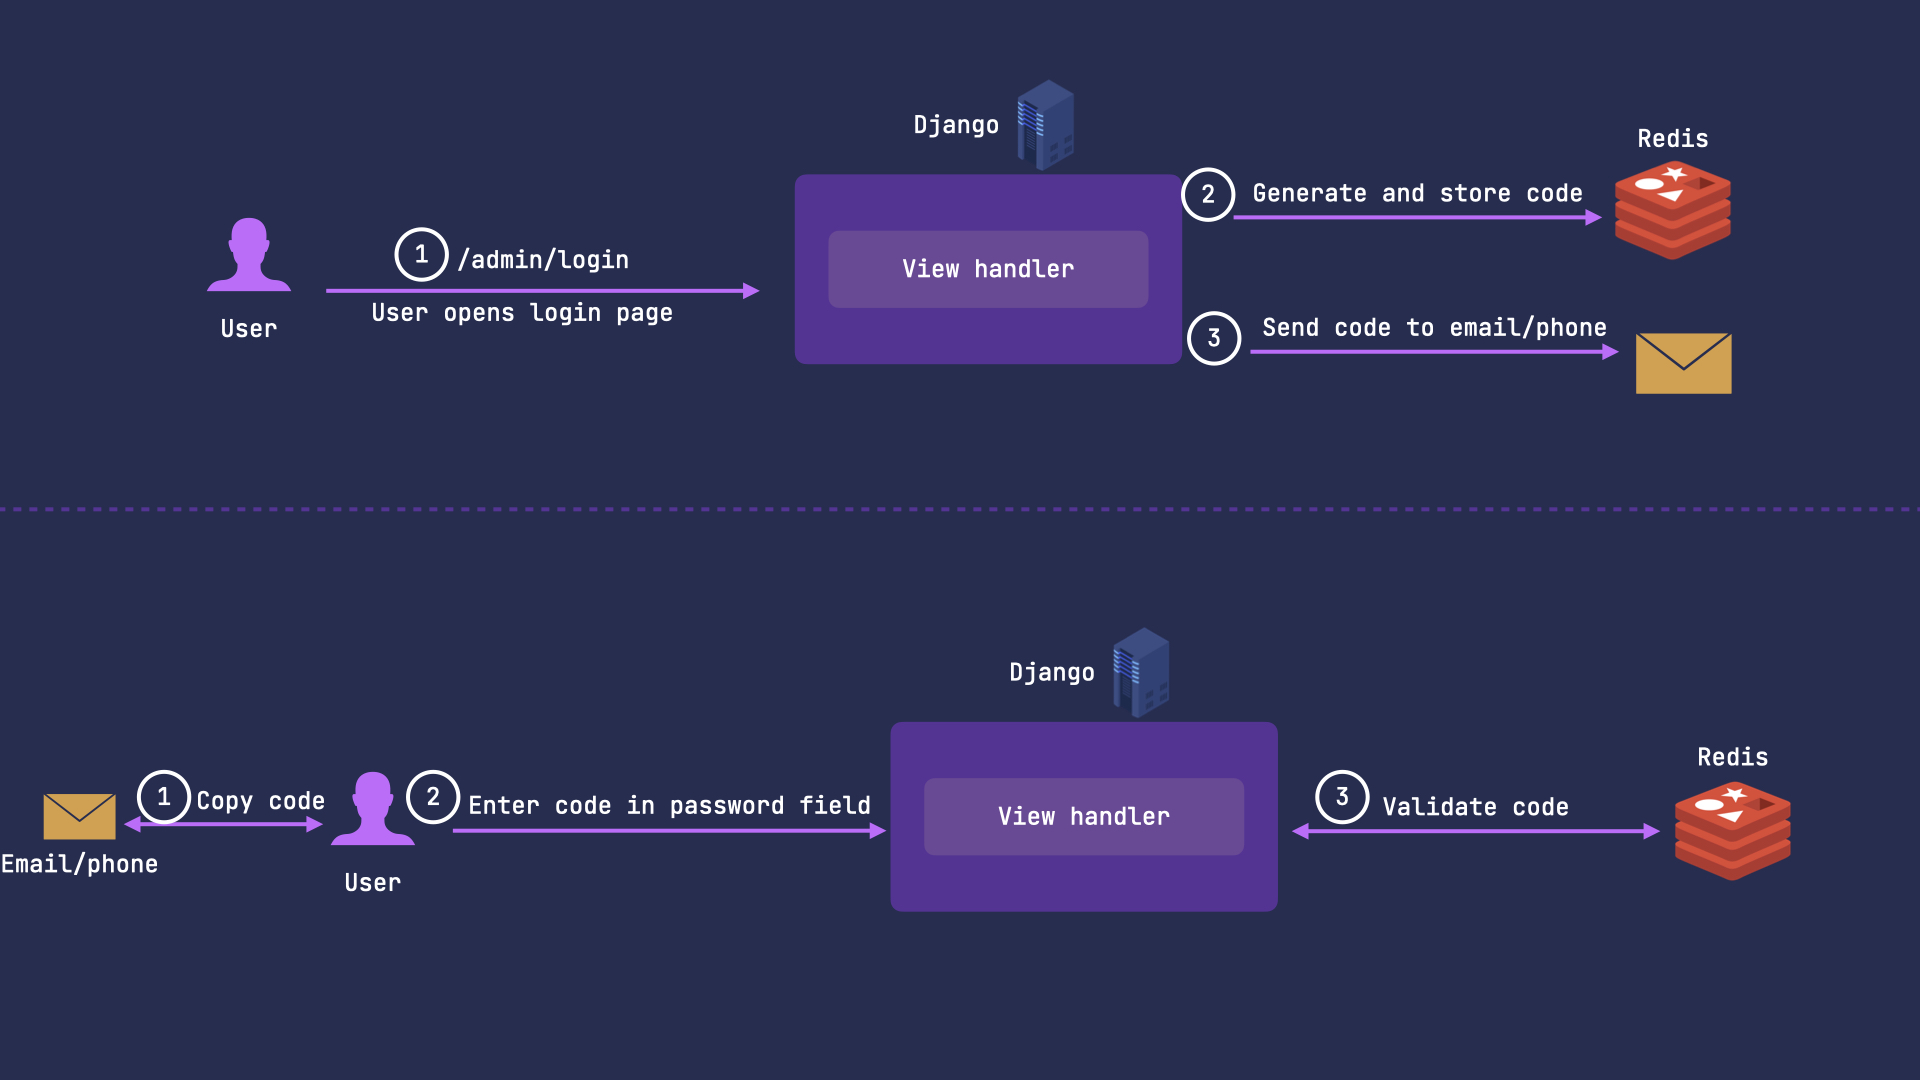
One time password(OTP) functionality allows you not to store passwords in your databases. It lets to generate passwords valid for a certain amount of time and usable only once. It uses redis to store and retrieve one time passwords.
OTP models
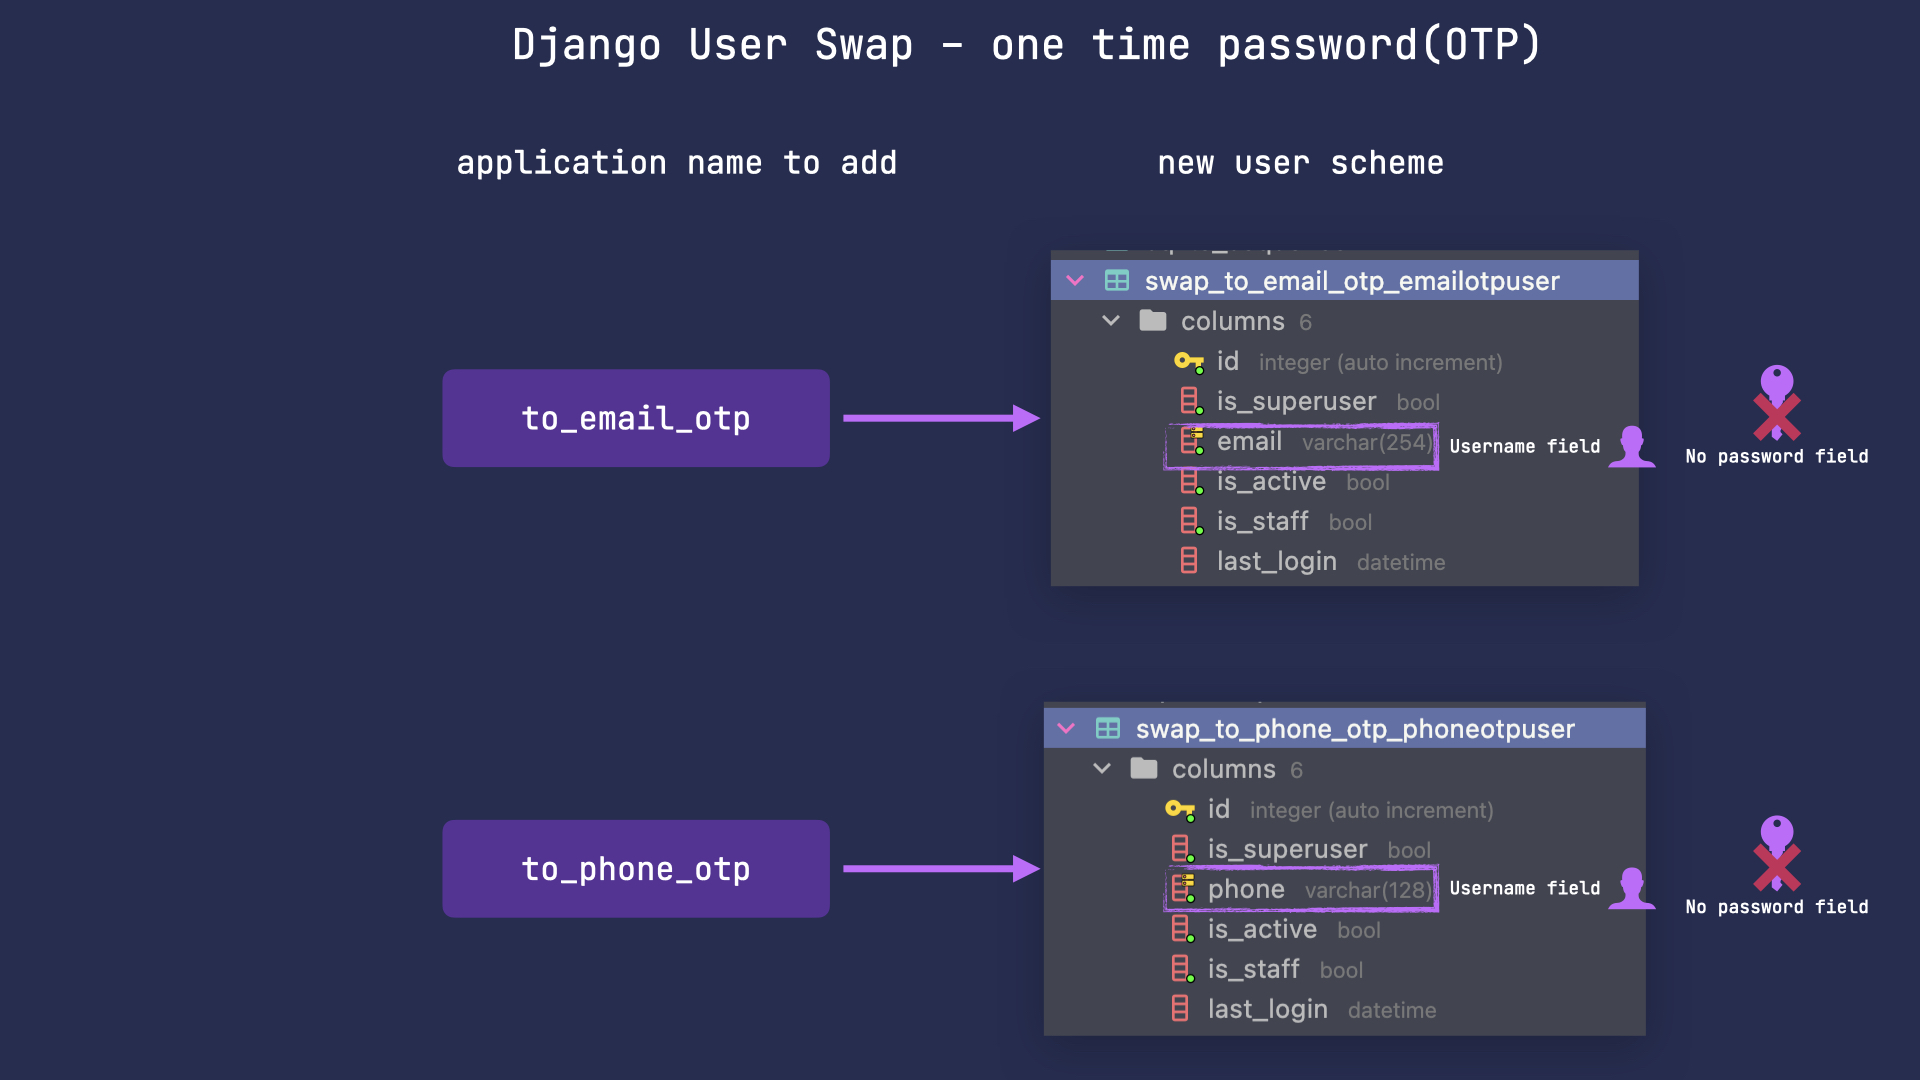
OTP models are almost the same as other swap models. The key difference is that they don't have password fields.
To use specified model with OTP functionality follow the steps below.
Step 1 - change INSTALLED_APPS
Add the following apps below to INSTALLED_APPS in order to swap to the specified OTP model.
Step 2 - set AUTH_USER_MODEL
Step 3 - replace django.contrib.admin
In order to render django admin pages properly with one time password login enabled you should replace django.contrib.admin in
your INSTALLED_APPS to the one below:
Step 4 - apply migrations
Step 4 - install redis cache libraries
Step 5 - set redis as cache in settings
Step 6 - set sender class
# For phones otp you need to define your own sender class
# sender.py
from swap_user.otp.senders import AbstractOTPSender

class MyPhoneOTPSender(AbstractOTPSender):

    def send(self, receiver: str, otp: str, **kwargs):
        # implement your logic here.
        # For example, interaction with sms/push API.
        pass

...
# settings.py
SWAP_USER = {
    "OTP_SENDER_CLASS": "<path_to_your_sender_class>",
}
Email OTP showcase - login into the admin
Custom sender class
By sender we mean class that sends your one time password over a specified transprot(using email, sms, push, etc).
You can implement any custom sender class and use this as your transport backend.
Example is shown below.
from swap_user.otp.senders import AbstractOTPSender


class PushNotificationsOTPSender(AbstractOTPSender):
    """
    Sending code over push.
    """

    def send(self, receiver: str, otp: str, **kwargs):
        PushAPI.send(to=receiver, title='Use this code', text=otp)
Then include your class path into the settings: